Published on 27 August 2019
Introduction to zero flow
This guide describes how to generate a controlled flow inside a microfluidic chip and stop it completely and instantaneously (zero flow) by using an Elveflow® pressure control instrument (OB1) and 3/2 valves.
In order to provide an example of a zero flow experiment, fluorescent microspheres in poly-ethylene glycol were injected in a microfluidic chip.
First of all, the microfluidic system is filled with the buffer medium. Once the full system is completely filled and the air bubbles have been removed, the microsphere solution can be placed in the reservoir.
Please note that in order to ensure a good zero flow performance, the sample solution has to be miscible and must have the same density as the buffer medium that fills the microfluidic system.
Different strategies exist to perform a zero flow experiment. Three different setups have been developed by Elveflow depending on the application and the number of inlets and outlets on the microfluidic chip.
The following two setups is the simplest for a zero flow experiment but it is also possible to perform a very well controlled zero flow with a MUX Cross Chip using this application note.
Zero flow experiment applications
Achieving zero flow in a microfluidic chip can improve the results of a wide variety of applications, from cell migration study due to chemotaxis (Yang et al., 2015) and long-term cell culture and detection (Sang et al. 2015) to precisely measuring the performance of a microfluidic fuel cell (Cuevas-Muñiz et al. 2012).
Single channel chip zero flow setup
Principle
Just removing the pressure from the OB1 pressure controller (by setting the pressure at 0 mbar) is not sufficient to totally and instantaneously stop the flow as the pressure balance can take some time to balance itself, creating some residual flow at first.
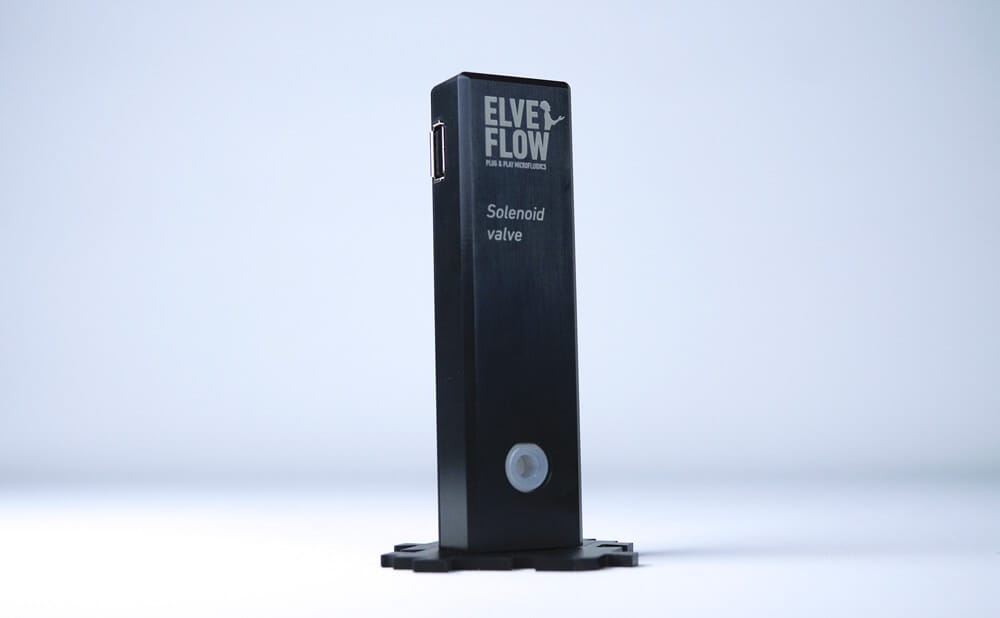
Therefore, a simple setup is created to balance the pressure between the inlet and the outlet of the microfluidic chip by applying the same pressure with the OB1 flow controller using a T-junction connector and a 3/2 valve (1 inlet and 2 outlets).

List of components
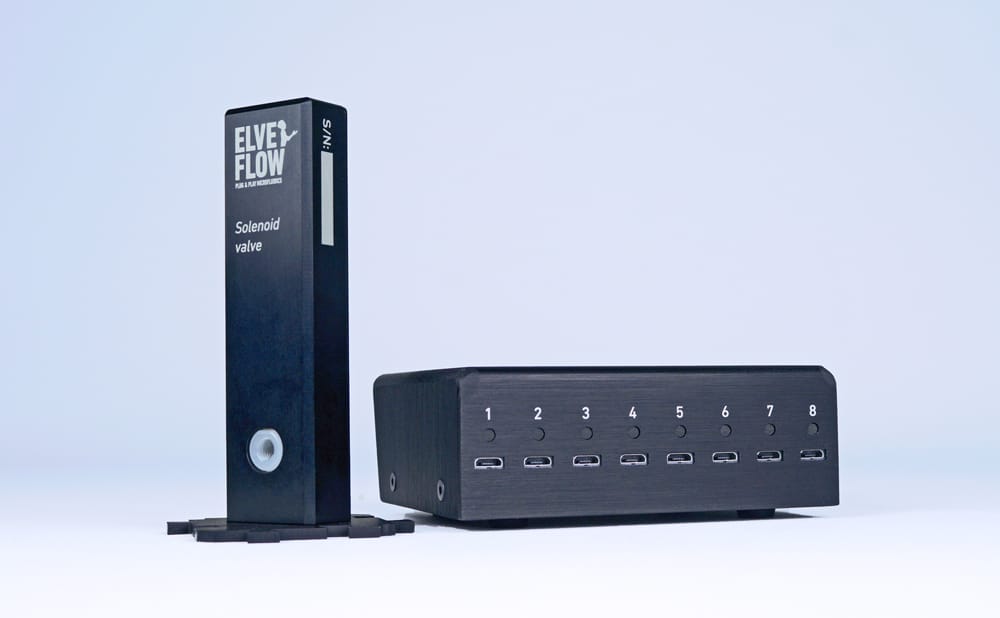
MUX Wire (valve controller)
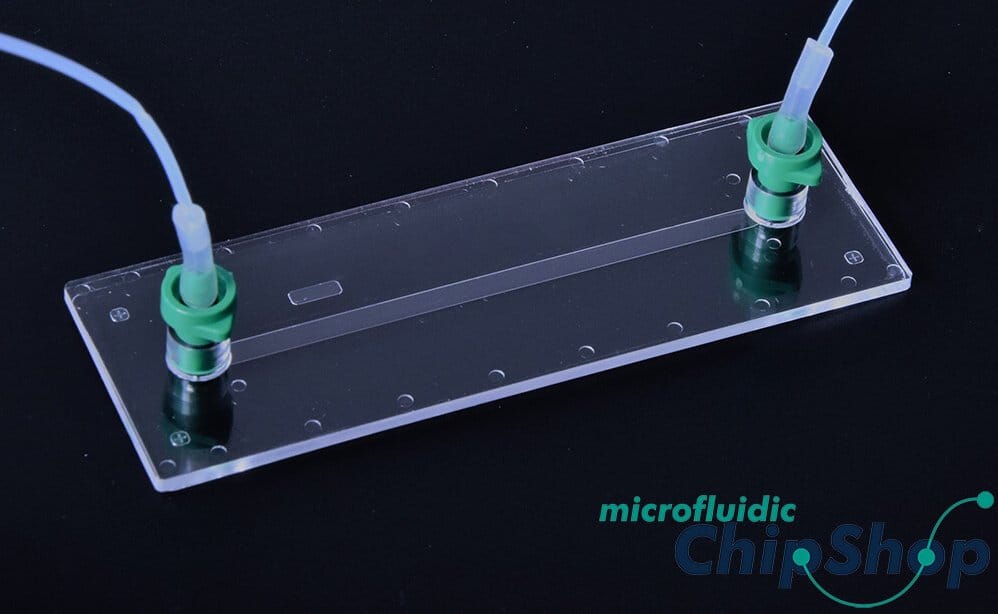
Fluidic 268 chip from microfluidic ChipShop
TIP FROM THE EXPERT: As often as possible, avoid using soft tubing (like Tygon) which involves compliance and then increases the response time of the system.
The following diagram illustrates the complete chain of elements needed for this first setup:
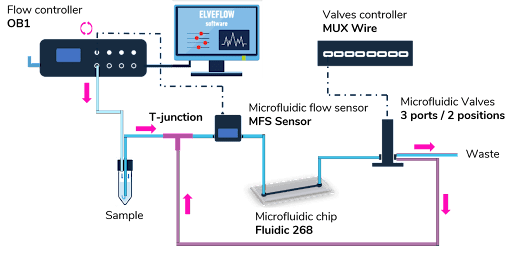
A flow sensor can be added, between the T-junction and the inlet of the chip, with a feedback loop to the OB1 to control the flow rate in the chip instead of the pressure.
It is also possible to pressurize the waste reservoir with an additional OB1 active channel to increase the flow stability for the same pressure difference by increasing the pressure at both the inlet and the outlet.
TIPS FROM THE EXPERT: the zero-flow speed and stability can be improved by increasing the fluidic resistance through the use of flow restrictors.
[starter_pack_rebound]
Protocols
Elveflow quick start guide
MAY THE FLOW BE WITH YOU
- Connect your OB1 pressure controller to an external pressure supply using pneumatic tubing, and to a computer using USB cable. For detailed instructions on OB1 pressure controller setup, please read the OB1 USER GUIDE.
- Plug the microfluidic reservoir to the OB1 pressure controller outlet. The ELVEFLOW RESERVOIRS connection instructions are covered by a specific guide (see Elveflow microfluidic reservoirs assembly instructions).
- For the feedback loop, connect a flow sensor to the OB1 with a wire. Then, connect the flow sensor with tubes between the microfluidic reservoirs and the chip.
- Turn on the OB1 by pressing the power switch.
- Launch the ELVEFLOW SOFTWARE. The Elveflow Smart Interface’s main features and options are covered in the Smart Interface guide. Please refer to those guides for a detailed description.
- Press Add instrument \ choose OB1, give a name to the instrument and press OK to save changes. The OB1 flow controller should now be in the list of recognized devices.
- OB1 calibration is required for the first use. Please refer to the OB1 USER GUIDE.
- Add flow sensor: press Add sensor \ select flow sensor \ analog or digital \ max flow rate for the sensor, give a name for the sensor, select to which device and channel the sensor is connected and press OK to save the changes. The connected flow sensor should be in the list of recognized devices. For details refer to Microfluidic flow sensor user guide.
- Add MUX Wire: press Add instrument \ select MUX Wire and give a name to the instrument.
- Use the supplied 1/16” OD tubing to connect microfluidic reservoirs with the chip. Your MUX Wire should be in the list of recognized devices.
- Open the OB1 and the MUX Wire windows.
Using the Elveflow smart interface to perform a zero flow:
Be sure that all the cables and tubing are well connected to the Elveflow devices (USB cable, 24V DC, etc).
Perform leakage tests and remove any air bubble before starting the experiment to ensure a good flow regulation. This step is extremely important since air bubbles can contract or expand depending on the pressure applied, preventing the zero flow experiment to be instantaneous.
A) An easy protocol to achieve a zero flow experiment with a simple chip with one inlet and one outlet
- Step 1 – Put the desired solution in the reservoir
- Step 2 – Remove the close loop tubing from the T-junction and place it to the waste.
- Step 3 – Set a pressure or a flow rate value (300 mbar for example) the channel used and start pumping liquid into the entire system.
- Step 4 – If the flow is not flowing to the waste, go to the MUX Wire window, as shown on the following picture, clic on the valve state of the corresponding valve (a small noise should be heard from the valve when the position is changing).
- Step 5 – Once the filling is done and no bubbles are left, connect the close loop tubing back to the T-junction.
- Step 6 – Tick the box in the MUX Wire window to stop the flow. The flow can now be started or stopped without residual flow just by clicking the valve state (it is also possible to create a sequence to automate the process, as explained in the next steps). Enjoy!
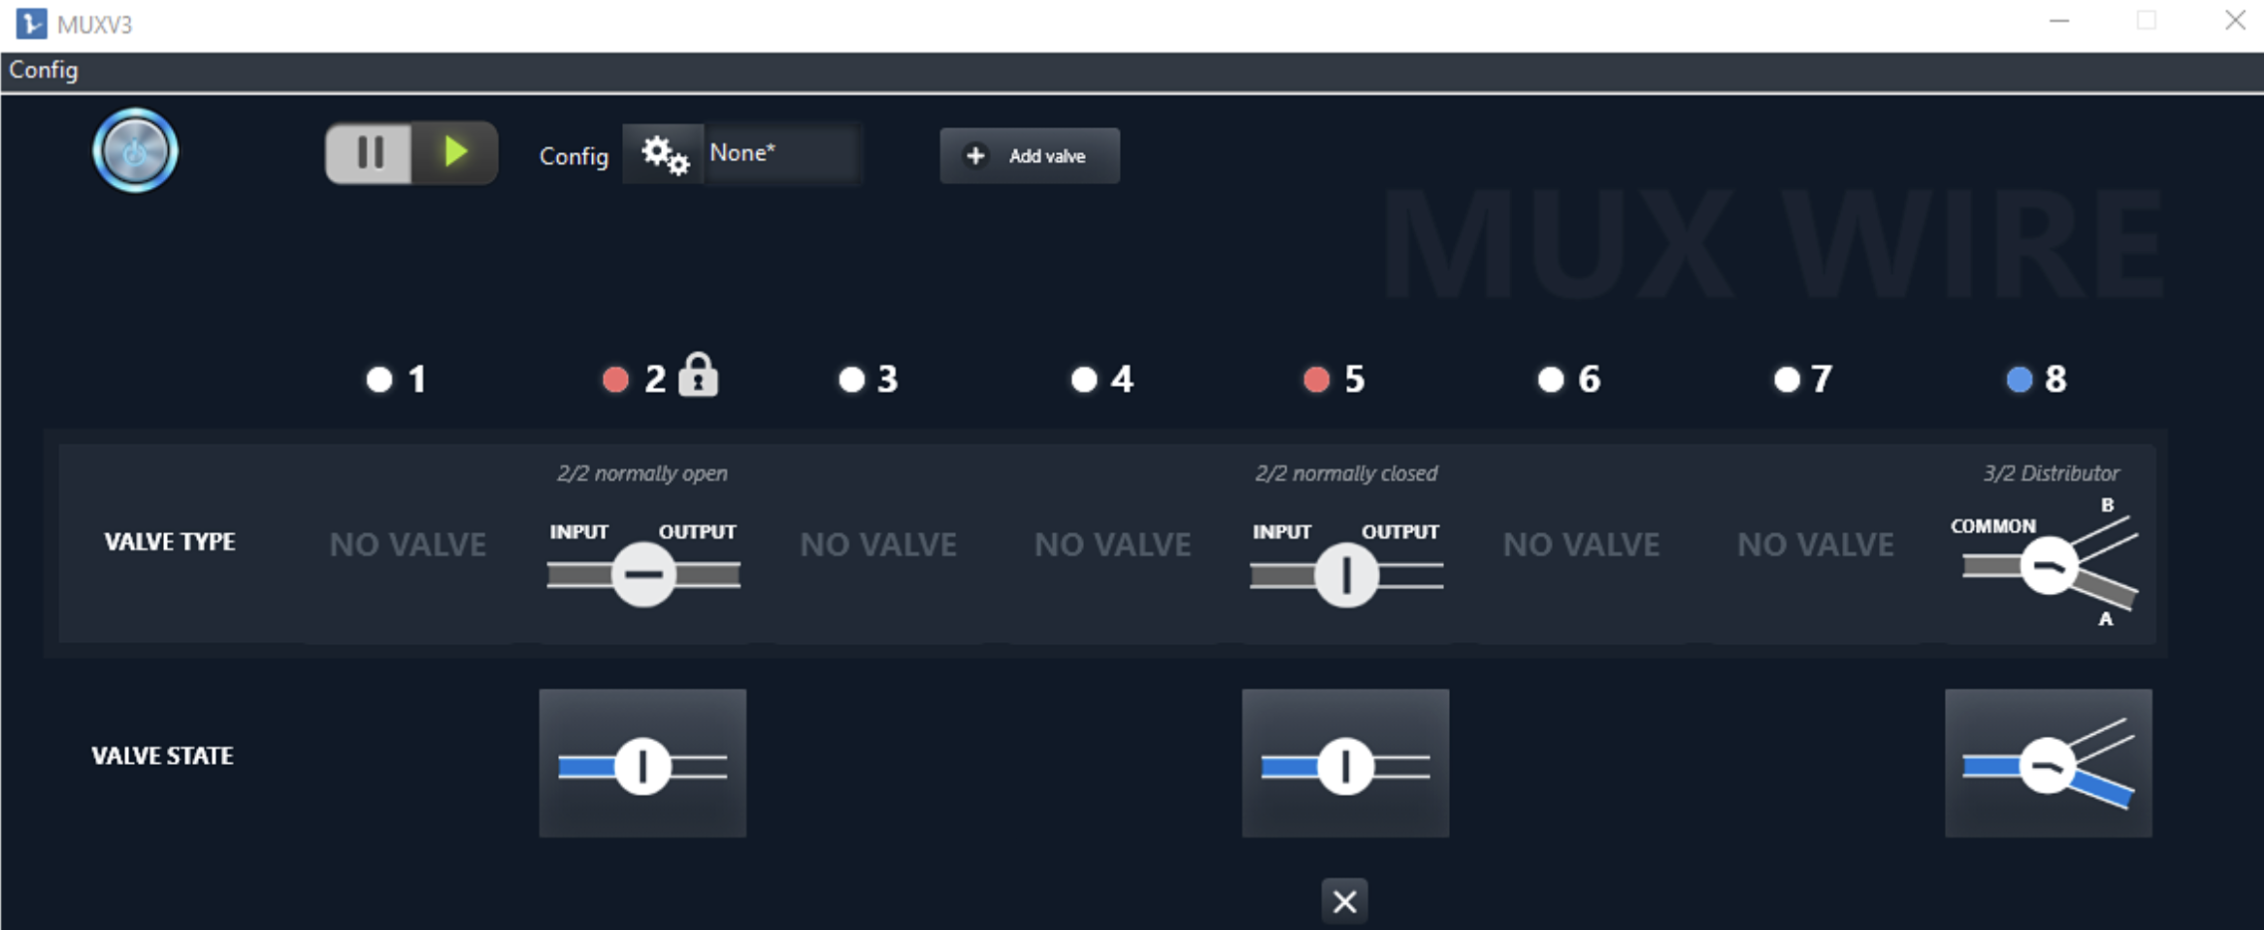
B) A sequence can be created to automate this process once the above steps are done
- Step 1 – To create a sequence, click on the top middle button “Create Sequence”: a new window will appear.
- Step 2 – Back to the OB1 window: set up the desired flow rate or pressure for your experiment on the expected channel and save the configuration.
- Step 3 – Back to the MUX Wire window, save two configurations: one configuration where the valve is open to the waste (called OFF) and one configuration where the valve is open to the close loop tubing (called ON).
- Step 4 – Back on the sequence window: on the left side of the window, click on the green “OB1” box (a line “OB1: Select instrument” appears in the middle part), on the right side, select the instrument (your OB1 pressure controller should appear when clicking on “Instrument”) and “load the configuration” saved previously.
- Step 5 – On the left side of the sequence window, click on the purple “MUX” box (a new line “MUX: Select Instrument” appears): select your instrument and load the configuration OFF (flow to the waste).
- Step 6 – On the left side of the sequence window, click on the “Clock” box (a new line with a time frame appears): set a desired duration for the sample to flow before being stopped.
- Step 7 – On the left side of the sequence window, click on the purple “MUX” box (a new line “MUX: Select Instrument” appears): select your instrument and load the configuration ON (flow through the close loop tubing).
- Step 8 – On the left side of the sequence window, click on the “Clock” box (a new line with a time frame appears): set a desired duration for flow being stopped.
- Step 9 – Option: on the left side of the sequence window, click on the “GO” box. This step will allow you to repeat your sequence: choose the “target step” (2 if you want to repeat the all sequence) and “time” for how many times you want this to repeat.
Congratulations! A sequence that automatically creates a zero flow event after a set time has been created. It can be included in more complicated experiments.
You can save and load specific configurations for each instrument. It is then possible to combine them to create a sequence that you can save to obtain an automated process for your application.
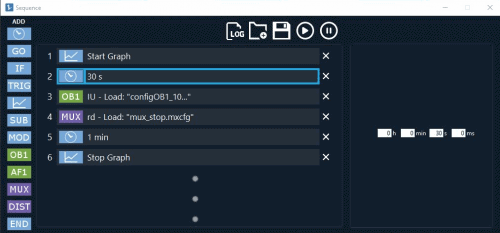
Example of an automatised sequence to perform a zero flow experiment.
Two inlets/outlets channel zero flow setup
Principle
Microfluidic chips usually have several inlets and outlets that require a slightly more complicated setup to perform a zero flow experiment. This second setup is nearly the same one as the one above and use the same principle to achieve a zero flow. As it is more difficult to instantaneous zero flow, it is strongly advised to add some resistance tubing flow restrictors in the microfluidic circuit.
List of components
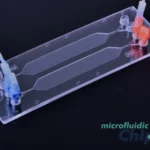
Fluidic 172 chip from microfluidic ChipShop

MUX Wire (valve controller)
Zero flow setup diagram
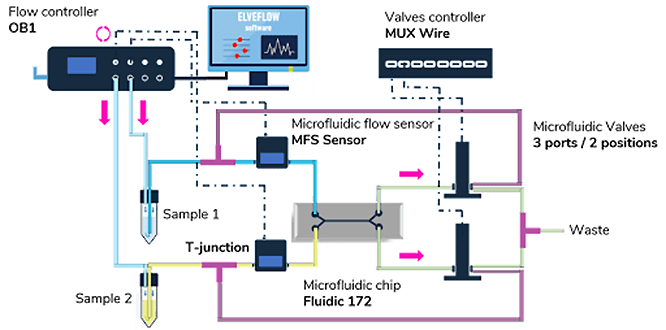
It is advised to add 2 flow sensors, one before each inlet, to control the flow rate for each fluid. A feedback loop can be made from one of the sensors to the OB1 to control the flow rate in the chip instead of the pressure.
The valves should be closed at the same time (by using the stop button on the software, change the valve’s state and only then use the play button) or a flow will be created between the two outlets of the microfluidic chip.
Congratulations on your zero flow! You completely stopped the flow by using an Elveflow OB1 and 3/2 valves!
Application note written by Audrey Nsamela – Acknowledgement: This work was done thanks to the funding of European Union’s Horizon 2020 research and innovation programme Active Matter (H2020-MSCA-ITN-Action “Innovative Training Networks”, Grant agreement number: 812780).
Updated by the Elveflow team March 15 2024

Microfluidics knowledge
Do you want tips on how to best set up your microfluidic experiment? Do you need inspiration or a different angle to take on your specific problem? Well, we probably have an application note just for you, feel free to check them out!

 Job
Job Collaborations
 Customer
 Other
Other